Showing posts with label recipe. Show all posts

Recipe: Cinnamon Tomato Pasta w/ Apple Balsamic Pork Loin #DominickIntl

Perfect Fall Dinner

Looking to spice dinner up a bit? Want something Autumny to serve to your family? Tweak a recipe you love with an international ingredient and experience the magic. You can find international grocery staples now at Dominick's so don't fret about finding the nearest Italian Import or Polish Deli; you can create international locally!


Pasta. We associate it immediately as Italian, but did you know that Greeks love their pasta too? What I found to be the distinguishing factor is the seasoning in the sauce. Cinnamon. Yep, cinnamon in the tomato sauce takes it south of the boot. Here is a quick and easy Greek Tomato Sauce that sends the scent of Autumn throughout your kitchen!


Cinnamon Pear Tomato Pasta

3 tbsp Olive Oil
1 Medium Onion, chopped
1 tbsp Garlic, minced
2 tbsp Oregano, Fresh
1 Bay leaf
1 tsp Cinnamon
1/2 tsp All spice
3 tsp sugar
1 28 oz can Dell' Alpe Imported Pear Tomatoes, chopped
1 28 oz can Dell' Alpe Crushed Tomatoes
Salt & Pepper to taste
1 lb Racconto Mezza Rigatoni

In a large pot sweat the onion and garlic in olive oil, about 5 minutes on medium heat. Add tomatoes and seasonings. Stir. Bring to boil for 5 minutes then reduce to low. Let simmer for about 30 minutes. Add sugar, 1 tsp at a time and adjust to taste. I like my sauces less acidic and sweet, 3 tsp will get it there.  Let simmer another 30 minutes. Stir frequently. Add salt and pepper to taste.

Cook your Racconto pasta according to directions on package. Remove bay leaf from sauce and serve over the pasta. 

This is a great base for other ingredients. Add meat if you like meat sauce. Have a bounty of peppers or spinach from your garden? Add those too. 


What other flavor of fall stands out beside cinnamon? APPLE! To go with the pasta I made a pork loin baked in an Apple Juice-Balsamic Vinegar Reduction. Here's the recipe:

Apple-Balsamic Pork Loin

2.5 lb pork loin
2 cups Garden Aseptic Apple Juice (found in the Polish food section at Dominick's)
1/2 cup Balsamic Vinegar
2 tsp sugar
1/4 tsp Cloves, ground

In a saucepan bring to boil the apple juice and balsamic vinegar.  Add sugar and cloves, turn heat down to medium and simmer until reduced by about 1/2. It will thicken a bit but not much. Should yield about 1/2 cup.

Heat oven to 325 degrees. Place pork loin in a baking dish. Pour reduction over the the pork loin, cover dish with foil and bake for 35 minutes. Pour the apple-vinegar sauce mixed with meat juices back in sauce pan. Bring to hard boil and reduce til syrupy. Pour half on pork loin, place back in oven and cook for another 10 minutes. Use a meat thermometer to make sure the pork is cooked through to 170 degrees.

Slice and plate pork. Drizzle remaining reduction over the slices or to the side for dipping.

Not feeling Greek or Polish? Well, Dominick's has over 1000 new international items with great everyday prices including Italian, Polish, Hispanic, German, Kosher, Irish, Asian, and Middle Eastern. Next on my shopping list? German SpaetzleAuf Wiedersehen.


WAIT! 

Want to win a $50 Dominick's Gift Card to try out some new international items? 
SIMPLE, just Tweet me about your favorite international ingredient.  
Use this as your template:  
@TheMomStandard My Favorite Intl ingredient/dish is _______! #DominicksIntl @Dominicks  
A winner will be chosen Sunday evening!


*I was provided a Gift Card to purchase ingredients needed for my recipe creations. 
All opinions are my own.*


Make Your Own Ketchup [Recipe]

Gourmet Ketchup from your Garden!


With 5 pounds of garden tomatoes, no desire to make more marinara sauce, and a daughter who puts ketchup on EVERYTHING, I thought, "What the heck I'll make some ketchup, if it sucks, I'll go spend $1 and get the store stuff."

Well, it didn't suck!

After scouring the web I found a seemingly easy recipe and tweaked it to meet my lack of patience and "rustic" culinary prowess.

Now, don't go thinking it takes no-time to make this stuff, it doesn't. Allow yourself a good 3 hours to go back and forth stirring the pot to avoid burning. You don't have to stand over the pot for a full three hours, just every few minutes go in and stir it, then continue about your household business.

KimD's Homemade Ketchup

5 pounds tomatoes, quartered.* 
2 medium onions, chopped
3 green peppers, chopped
1 Tbsp Salt
1 Tbsp Paprika
2 Tsp Cinnamon
2 Tsp Celery Seed
1 Tsp All Spice
3/4 Cup Sugar (or more for taste)
1-1 1/2 Cup Vinegar (based on taste)**

Cook tomatoes, onions, peppers in large pot until soft. 


Put in food processor and puree. Heads up, know how to work your food processor. I didn't and this is what happened:

Transfer the puree back to the pot and cook on rapid boil until thick, about 1 hour give or take. MAKE SURE IT IS THICK. If you question the thickness, it's not thick enough.

Add all the spices, sugar, and salt. Cook on medium to medium-low heat for about 30 minutes, stirring often...sugar likes to burn so stay close. Add the vinegar, I suggest to add 1/2-3/4 cup at first, let it simmer a few minutes, taste it and if the pucker on your face doesn't knock you over it's good. If the sweetness makes your teeth hurt, add a bit more of the vinegar. Now's the time to add more salt or other seasonings. It's all about your personal flavor preference here. Shoot, if you are all about heat, add some jalapenos or chilies now too!  Keep cooking the ketchup until it thickens. Make sure there is little liquid bubbling on top.

Pour into mason jars, leaving 1/4" from rim if you are going to process in a water bath to can this for a long shelf life. I knew we'd go through it in no time, so no water bath for my batch. This makes about 1 quart + 1 pint.


Enjoy!

*I used all the varieties we grow in the garden, including grape and cherry. Here's my laziness...I refuse to blanch, peel, core tomatoes so I did not. I cut off the stem part and then cut all the tomatoes into quarters. If you want your ketchup to be smooth and bit free, then go right ahead and peel & de-seed them.

I turned ketchup making into a homeschooling practical life lesson of knife work. ANNNND she cut her finger. Lesson learned, on both our parts.

**I used white vinegar but cider vinegar or even red wine vinegar will enhance the flavor, make it more "gourmet" tasting


Provincial Chicken & Rice: Low fat, Low Calories Recipe

Another recipe I put together using ingredients I had in house. The more I read about and cook,  I realize this is exactly what Mediterranean style cooking is. Use what you have...fresh, in season, minimum additives. Last night's dish was just that and delicious. AND the color theme is Red, White, and Green: In celebration of Italy's win yesterday. :-)

Provincial Chicken & Rice


3 Chicken Breasts, 1" cubed
2 Cups Instant Brown Rice
2 Cups Largely Cubed Zucchini
2 Tomatoes, rough diced
1 Cup Grape Tomatoes, halved
1 Green Pepper, Diced
3 Cloves Garlic, Minced
2 TSP Rosemary, dried (fresh if you have it)
1 TBSP Italian Seasoning 
Salt to taste
2 Cups Chicken Broth
1/2 Cup Water
2 TBSP Olive Oil to brown chicken in

In a large skillet, add the olive oil and heat. Brown the chicken cubes, about 10 minutes. Add the rice, garlic, and Chicken Broth. Bring to a boil, then let simmer for 8 minutes until the rice is tender. Add the water and remaining ingredients, including seasonings. Bring to a boil for 5-7 minutes until the zucchini is slightly tender, stirring frequently so the rice does not stick. You do not want to cook the crunchiness out of the green veggies! Taste to see if you need to add salt. Serve hot. Six Servings. Oh and each serving is a bit less than 400 calories and very low in fat. GOAL!


One Pan Cooking is the best! Less Mess!


Bruschetta Chicken Bake Recipe

Becoming Italian: Bruschetta Chicken Bake: Looking for a fresh, healthy, and easy chicken dish with the taste of summertime? So was I. I scoured the internet for a chicken bruschetta recipe and all of them contained Stove Top Stuffing mix. Um, bruschetta does not taste like Thanksgiving dinner. I quickly discarded my search and created my own recipe.

Bruschetta Chicken Bake


3 chicken breasts, cut in half lengthwise
5 tablespoons EVOO
1/2 cup Fresh chopped Basil
1 tablespoon Fresh chopped Oregano
Dash of salt

2 Cloves Crushed Garlic
3 Roma Tomatoes, chopped
3/4 cup Grape tomatoes, halved
1 onion, chopped
1/2 cup Shredded Mozzarella Cheese (optional)
1/4 loaf of French Bread (stale is ideal)


In a 2.5 quart baking dish, place the chicken breast strips. Cover with 4 tbsp of the EVOO. In a separate bowl combine the tomatoes, onions, basil, oregano, salt, garlic, 1 tbsp EVOO, and 1/2 of the mozzarella. Pour mixture over the chicken breasts, cover with remainder of cheese. Cut french bread to cover entire dish. Cover dish with foil and bake for 40 minutes or until the chicken is completely cooked. Serve either warm or cold with extra pieces of bread. Perfect summertime dish.


Next Recipe: Provincial Chicken & Rice

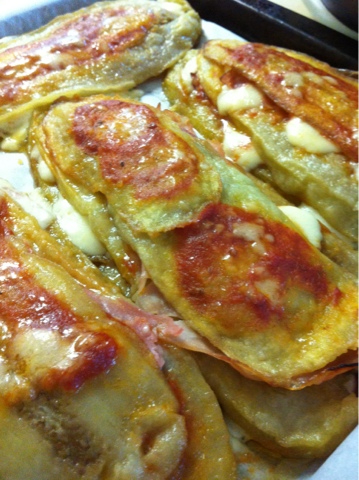
Recipe: Eggplant, Capicola, Mozzarella Bake

Becoming Italian: Eggplant, Capicola, Mozzarella Bake: A few weeks ago my FIL did some experimenting in the kitchen and came up with this delicious  Eggplant, Capicola, Mozzarella dish!

E. C. M. Bake

1 large eggplant
flour for dusting
Olive Oil for frying
Capicola
Mozzarella cheese
Marinara sauce

Heat about 1/2 cup oil in frying pan. Thinly slice peeled eggplant. Dredge in flour for a light coating. Fry eggplant slices. Let cool on paper towel to soak excess oil. Once cool, line a 13x9 baking dish with a layer of the eggplant. Next the capicola, marinara, and sliced cheese. Repeat until the top layer is the last of the eggplant slices. Spoon more marinara on the top and add some extra cheese. Bake for about 20 minutes or until the cheese is completely melted. Serve with a fresh garden salad. Enjoy!

National Egg Day: Baked Eggs Recipe

June 3, 2012 is National Egg Day! Aren't you Egg-cited? To celebrate, think outside the carton and make an egg dish that's a bit more egg-traordinary. Scrambled, fried, poached, omletts...those are for everyday. Today is special.  Here is a delicious, easy to prepare, and different egg dish to serve the family: Baked Eggs

Baked Eggs
Makes 3 servings

6 large eggs
6 tbsp low fat shredded cheese of choice
3 tbsp chopped chives
Salt
Pepper

Preheat oven to 325 degrees. Take 3 10 oz casserole dishes, spray with a non-stick spray. Carefully crack two eggs in each dish. Sprinkle a tbsp of chives, salt & pepper on each dish. Put dishes in a large 13x9 baking pan. Pour hot water into the baking pan about 1" deep.

Place pan in oven, bake for 20 minutes. Add 2 tbsp shredded cheese on each casserole dish and place back in oven for 5 more minutes. Be very careful pulling the pan out, the water is hot and can splash out if you get all Speedy Gonzalez on it.

Serve warm with whole grain toast or a plate of fried hash-browns! Yum!


Recipe: Go Greek! Yogurt & Cucumber Sauce. EASY!

Tzatziki (Yogurt &Cucumber Sauce)


Tzatziki is definitely not an Italian dish; it's 100% Mediterranean and delicious! I suggest to make this a few hours to a day before you plan on using it just so the flavors set in and get stronger. If you can't wait that long, it's still good immediately after making. I use this on falafel, as a side salad, and thin it with a bit of water to use as a dressing for a baby spinach salad. It's of course great with gyro meat and any lamb dish.

1 large, long cucumber
Salt
2 Garlic Cloves
1 tbsp White Wine Vinegar
2 tbsp Olive Oil
1 1/2 cups Plain Greek Yogurt, non fat can be used
1 tbsp Dried Mint or 2 tbsp fresh mint (I use fresh wild mint from my garden)
2 tbsp Fresh Mint for garnish

Peel the cucumber. Thinly slice and quarter it. Put in a bowl, sprinkled with salt. Let sit for about 15 minutes to draw out some of the water.

In the main bowl, crush the garlic with 1 tsp salt until it is almost a paste consistency.  Add the vinegar and olive oil, mix thoroughly. Stir in the yogurt and dried mint.

Place sliced cucumber in colander and rinse for 5 minutes under cold water to remove all the salt. Stir it into the yogurt mixture. Garnish with fresh mint.

Best served chilled.


Quick & Easy Recipe: Italian Easter Ring Cookies


2.75 cups flour
3/4 tbsp baking powder

3 eggs
1/2 cup sugar
6 tbsp butter, melted
1 tbsp vanilla extract

Icing
3 cups powdered sugar
1/4-1/2 cup water
1 tsp vanilla extract
1 tsp lemon extract
Sprinkles


Preheat oven to 350

In a large bowl soft the flour and baking powder.

In a medium bowl whisk the eggs then slowly add the sugar then add the melted butter and vanilla slowly.

Fold the egg mixture into the flour mixture. Knead the dough in the bowl until it is a good cookie dough consistency.

Pull 1" size balls of dough, roll between hand to form a 3-4" rope. Loop and pinch ends together. Place on lightly greased cookie sheet 1" apart.

Bake for 22 minutes until brown. Let cool.

Combine icing ingredients. When cookies are cool dip tops in icing, place on cooling rack, add sprinkles.

Pupa con L'uova - Italian Easter Bread Recipe

 2.25 tsp instant yeast
pinch of salt
2 eggs, beaten
1.25 cups milk
1/3 cup butter, melted
1/2 cup sugar
4 cups flour

1 egg, beaten with 1 tsp water
6 Easter Eggs
Decorative edible sprinkles

Combine melted butter with milk and heat til just warm. In your mixer bowl combine the yeast, salt, sugar, 2 eggs. Using your dough hook mix these until well incorporated then add warm milk/butter and combine. Once all is combined add the flour until the dough is not too sticky. Knead the dough until smooth and place in greased bowl. Cover and place in warm area to rise until double in size.

Punch down the dough, divide it into 12 pieces. Roll each piece into long strands about 12-14 inches long. Take two strands and twist. Pinch both ends then form a loop and pinch ends together. Place on a cookie sheet lined with parchment paper. Let rise til double in size, about another hour.

Once loaves are risen, paint with egg wash, add the sprinkles and place an easter egg in the center, making sure to push it down for an indention. You do not need to hard boil the eggs before, they will cook in the oven with the bread. Just be careful when coloring and placing them.

Bake at 350 degrees for about 20 minutes until the tops are a golden brown.

These make great gifts too! Put in a cello bag, tie a pretty bow around it and give to your Easter guests as a take home treat. I'd advise you to replace the real egg with a plastic egg for this, real eggs, though cooked will go bad after a bit.


Thumbs up by my official taste tester!

Free the Weed! Dandelion Jelly Recipe


Does the idea of Home Canning intimidate you? Some fond memories from my childhood are of canning.  As an adult I now realize why my parents had me start canning so young...to help break up the time. It does take a good time commitment. To this day string beans make me take cover like a tornado is heading my way! With Spring in the air I had a nostalgic desire to do some sort of canning, quick & easy canning of course.

Tuesday B & I went foraging for dandelions by the canal to make some Dandelion Jelly. "WHAT? You are going to consume dandelions?" Yep, and here's how:


Dandelion Jelly
(Yield: 4 cups)

4 cups dandelion petals
4.5 cups sugar
2 tbsp lemon juice
1 box powdered pectin


Cut the green part off the dandelions and collect 4 cups of just the pretty yellow petals. Its easiest if you do this when they are open. Put the petals in a pan and pour about 3 cups boiling water over them. Cover and let sit overnight. The next day, strain the "tea" into a measuring bowl with a coffee filter to remove all the petals. Add more water to the tea so it equals 3 cups (after the petals are removed...just a reminder).

Put your jelly jars in a hot bath until time to fill them. Add the tea, sugar, lemon juice, and pectin to a large saucepan and boil for 2 minutes. Pour the hot "jelly" into your jars, leaving about 1/4-1/2 inch room from the top. Put your canning lids on then seal them in a hot water bath for about 10 minutes. The jelly should set once the jars cool down, so wait until the next day to eat!

WAIT, you don't have a canning pot with a jar rack? Well, neither do I and until I score one from the thrift store I won't have one. Use a LARGE stock pot, fill with enough water to cover the jars by about 2 inches. Here's where you can get creative and daring: fold up a towel and put on the bottom of the pot to keep your jars from rattling around or falling to their sides OR if you have round cooling rack that will fit, put that baby in there. Bring the water to a boil then add your jars, very carefully. Since you have already cooked the jelly the sealing stage will go quick...about 10 minutes. When you take the jars out, a few minutes later you'll hear a ping...that's a good sound! It's telling you that your jars are sealed and can be stored up to a year!


I paired the jelly with Feta Cheese and Wheat Bread: D-Lish! The jelly has a lemon &  honey taste to it. If I were to try to sound like a foodie, I'd call the taste Regal. It is sweet yet tart and pairs well with other strong tastes...like cheeses. Of course you can put it on crackers or bread and gobble it up like that too!

From my homeschooling vantage this was a great opportunity for many "lessons:

  • We took a nature walk along an historic canal
  • Discussed Stranger Danger
  • Foraged for edible plants
  • Practiced Scissor Work & Fine Motor Skills
  • Practiced Basic math with measuring out the ingredients
  • Tried to practice Patience waiting for the jelly to set
  • Quality Mommy & Daughter time!


Let me know if you try it and what you think!


Gluten Free Diet -Polenta Chicken Pot Pie Recipe


Following a Gluten Free Diet - The growing Trend {Guest Post}
The Gluten free regimen is in fashion these days. Almost every individual who gets to know about the benefits of a Gluten free diet is motivated enough to go for it irrespective of the fact whether he or she is suffering from Celiac. The trend has been observed in the past few years and is not localized to any geographical location but is equally distributed across the country.

The benefits of a gluten free diet are immense thus its not surprising that a major chunk of the population has taken a fancy to this lifestyle. The gravity of change in the lifestyle of the American population can be gauged from the fact that 15% to 25% of consumers want gluten-free foods — though doctors estimate just 1% have celiac disease.

Apart from benefitting individuals suffering from Celiac a gluten free diet has its own benefits for normal individuals. Once an individual has migrated from a normal diet to a Gluten free diet chances are there is going to be an improvement in your cholesterol levels, digestion, and energy level. This is a big reason why people are fast migrating to this healthy lifestyle. Another factor that’s keeping the motivation level high towards a gluten free diet is the ability of an individual to loose weight while being on a Gluten free diet.

There are many misconceptions associated with a Gluten free diet. A major misconception that has no grounds is that a Gluten free diet will lead to deficiency of many essential nutrients. But same is the case with the normal diet if individuals don’t have a balanced diet. One needs to be careful even while having a normal diet to keep a balanced diet to keep any deficiencies at bay. Having a lot of fruits and salads is obviously going to be helpful in pulling one through the gluten free lifestyle with ease. 


Following a Gluten free regimen is not as difficult as it looks from the outside. Consider preparing chicken that is gluten free and healthy for the body. Go through the process and the ingredients you will find that its quite easy and does not deviate much from your culinary skills that you already posses. To prepare Polenta Chicken Pot Pies you need 1 tablespoon cornstarch, along with 3 cups gluten free chicken stock, 2 teaspoons olive oil, 2 carrots chopped into small pieces, Salt and Pepper to taste, 1 cup cream or coconut milk, 1 cup frozen baby onions, 3 cups cooked chicken meat, 1 tablespoon fresh rosemary mince it to have the right effect on the recipe, 1 cup frozen peas, ¾ cup quick cook polenta, 1 cup grated cheese. The cheese is optional if you have decided to make it dairy free.

Once you have all the ingredients lined up you need to mix the cornstarch with ¼ cup chicken stock and set aside. Concurrently in a large skillet or Dutch oven, warm the olive oil over medium-high heat and then add the chopped carrots. Season with salt and pepper and cook until the carrots just start to caramelize, about 5 minutes. Add 1 ¾ cups chicken stock, the cream or coconut milk, chopped chicken, frozen onions and minced rosemary and bring to a simmer. You can also add any roasted veggies you may have on hand, butternut squash or potatoes are particularly good. Let simmer about 15 minutes. The veggies should be tender and the chicken heated through. Add the frozen peas. Turn the heat up; bring the mixture to a boil and stir in the cornstarch mixture. Boil for 1 minute and take off the heat. Taste the mixture and adjust seasoning if needed. Divide the mixture between 4 oven proof bowls or ramekins and set them on a baking sheet.

Preheat the broiler and place the oven rack in the middle.

In a saucepan over medium high heat, bring the remaining cup of chicken stock and remaining half cup of cream or coconut milk to a boil. Gradually whisk in the polenta and cook until thick, about 3 minutes. Turn the heat to low and stir in the cheese until melted.

Its time to top the chicken mixture with the polenta and smooth it. Place in pre-heated broiler for 2 -3 minutes or until the tops are browned. Serve with a garnish of rosemary sprigs if desired.

Trust me the taste and texture of the chicken will be better than the regular chicken you have had before you actually went on a Gluten Free diet. The taste and variety available in the Gluten Free Regimen have improved by leaps and bounds which has attracted scores of individuals into its loop.
Links : 

===================

Author Bio:

The author, Elva G Lamont,  is an expert in writing on topics like Food, health and Medical Issues. She is a fitness freak and believes that nutritious food and good health are the essential elements of life that help a human being lead a quality life. Being gluten intolerant she is a big time advocate of a Gluten Free Food and Gluten Free Recipes

Super Super Bowl Snack: Cajun Caramel Corn Recipe!


Blazin' Cajun Snack & Dip Seasoning, (3.5 oz/100 g), 02069

Turn "ordinary" into "extraordinary" with our versatile Gourmet Snack & Dip Seasonings. Just mix with regular or low fat sour cream, pureed cottage cheese or plain yogurt to create delicious dips and spreads for everything from crackers to crudités. Mix with cream cheese for flavorful spreads for roll-ups, cheese balls and canapés.

Cajun Caramel Corn
Makes a great Super Bowl snack!

18 cups/4.5 liters popped popcorn
1 1/2 cups/375 mL firmly packed brown sugar
1/2 cup/125 mL butter
1/3 cup/80 mL light corn syrup
1 tsp/5 mL lemon juice
2 to 4 tsp/10 to 20 mL Watkins Blazin' Cajun Snack & Dip Mix
1/2 tsp/2.5 mL baking soda

Heat oven to 200° F/95° C. Pour popcorn into a large roasting pan.

In a heavy saucepan, combine sugar, butter, syrup and lemon juice. Mix well. Cook on medium, stirring frequently, until mixture comes to a boil. Boil until mixture reaches 260° F/125° C (hard ball stage). Remove pan from heat. Quickly stir in 2 tsp/ 10 mL of Watkins Blazin' Cajun Snack & Dip Mix and the baking soda. Pour over popcorn and stir to coat well. Bake for 1 hour in preheated oven, stirring every 20 minutes.

Remove from oven. Empty popcorn onto waxed paper. Break apart with hands. Sprinkle with additional Blazin' Cajun seasoning to taste, if desired. Store in a tightly-covered container.
Makes 18 (1 cup/250 mL) servings.

Quinoa Pantry Chili Recipe #Frugal #Delicious

Ok, I admit the photo does not do it justice. I'm not photographer, obviously!
Pantry Chili? Yep, that's when you scrounge through your pantry and pull out whatever you have that may work as chili. This year I have used my crock pot TWICE!  I've owned the darn thing for like 10 years and have probably before this year used it about 10 times. Any who, enough about my aversion to slow cookers.

Quinoa Chili (aka DELICIOUS)
Ingredient suggestions, substitute with what you have on hand if need be!

1/2 cup dry Quinoa
1 small onion diced
1 green pepper diced
2 cans Beans, drained. I used black beans this time.
1 cup frozen corn (because I had some in the freezer from xmas)
2 cups water
1 29 oz can tomato sauce
3 cloves minced garlic
1 tblsp olive oil

1 tsp cumin powder
1 tsp paprika
2 tblsp dried basil
1/2 tsp thyme
1/2 tsp marjoram
1 tblsp chili powder
1 tblsp soy sauce
1 tblsp molasses
1/4 cup cilantro
Salt & Pepper to taste

Directions: Put all ingredients above into crock pot. Set on low and let cook for 6 hours.
Do not be tempted to add more quinoa, a little turns into a lot when it fluffs up!  This chili will also be good with any type of frozen veggies you  have.

Make a fresh loaf of bread in your breadmachine and dinner for 2 nights is DONE!

You say Gravy, I say Sauce. Let’s Call it Ragu!

In many an Italian home on Sunday morning a big pot of Ragu is simmering to be ready for Sunday dinner. It is the simplest of recipes, quite economical, and can feed you for a week! Here’s how we make it in our home.

Strawberry Italian Ice

Strawberry Italian Ice

Perfect on a hot summer day!


Yep, that's a Gelato maker instead of an ice cream maker :-)


1 pound fresh Strawberries
1 cup sugar
1 cup water
Juice of 1 lemon
1 egg white

Make a simple syrup. Bring water and sugar to a boil. Remove from heat once sugar is dissolved. Pour in a bowl and place in refrigerator to cool.

Purée the fresh strawberries. Add lemon juice and mix well.

Combine syrup and puree mixture. Cool for at least an hour. When cool, mix in one lightly whisked egg white then put mixture into ice cream maker.


Run ice cream maker per manufacturer instructions. Serve ice immediately or freeze for up to 3 hours.


Buon Appetito!


(Instead of sugar, I used Splenda to save some calories)

Posted using BlogPress from my iPhone

I can't believe there's no Butter Garlic Shrimp

Raw shrimp, ready for cooking.Image via Wikipedia
What makes shrimp taste so good?

BUTTER!

Last night we grilled some marinated garlic shrimp that were buttery delicious...sans the butter!

I'm a sucker for extracts. Yep, I used Butter Extract! Here's the recipe:

2 pounds peeled shrimp
1 teaspoon gourmet quality butter extract
4 tablespoons water
3 garlic cloves, minced
2 tablespoons olive oil
Salt & Pepper to taste

Put peeled shrimp into a large bowl. In a small bowl, mix the water and butter extract. Pour over shrimp. Add the minced garlic & olive oil. Mix well. Let sit for an hour before grilling.

Serve with grilled veggies and a cold salad. Delish!

(psst, I can hook you up with the awesome extract. Shoot me an email for details.)
Enhanced by Zemanta

Need a gift?

The Perfect Gift for your baking Loved Ones!

Watkins Vanilla Classic Recipes Cookbook with the Award Winning Gold Metal for Highest Quality Double Strength Vanilla extract.

The Cookbook contains 88 recipes showcasing Watkins Vanilla! This quality hardbound book features a die-cut cover with custom illustration and vintage Watkins artwork and full-color photography. 128 pages; hardcover.

Your gift will be boxed in a bakery box with bow, ready for gift giving!
Add a personalized note for free!
Cookbook with 11 fl. oz. Vanilla $24.98 plus tax & $2.95 Shipping/Handling*


Cookbook with 2 fl. oz. Vanilla $16.58 plus tax & $2.95 shipping/handling*

This offer is only available thru Independent Watkins Associates #390284 Giuseppe & Kimberly Demetrio.

Watkins Vanilla Classic Recipes Cookbook & Vanilla Extract Gift

Vanilla Extract Size


*Shipping charge is PER SET. Shipping available to continental US states only.

Good 4 U Maple & Brown Sugar Oatmeal

Oatmeal is loved by both my daughter and I. Of course my favorite is Maple Brown Sugar Oatmeal with a bit of milk. Um, not good, especially after you add that big ole pat of butter. So I concocted a recipe that tastes like the high calorie, high sugar, high fat oatmeal but isn't! (And it's cheaper than those individual packets available in the stores)


Oatmeal
Water
Maple Extract(about 1/4-1/2 teaspoon)
Butter Extract (about 1/4-1/4 teaspoon)
Brown Sugar OR Brown Sugar Splenda
Skim Milk, if you like your oatmeal creamy
Microwave for 2 minutes

How awesome is this? I use the Splenda to keep our sugar intake low but you'd never guess! If you like other flavored oatmeal there are many flavors of extracts available!
Related Posts with Thumbnails