Showing posts with label DIY. Show all posts

Make Your Own Ketchup [Recipe]

Gourmet Ketchup from your Garden!


With 5 pounds of garden tomatoes, no desire to make more marinara sauce, and a daughter who puts ketchup on EVERYTHING, I thought, "What the heck I'll make some ketchup, if it sucks, I'll go spend $1 and get the store stuff."

Well, it didn't suck!

After scouring the web I found a seemingly easy recipe and tweaked it to meet my lack of patience and "rustic" culinary prowess.

Now, don't go thinking it takes no-time to make this stuff, it doesn't. Allow yourself a good 3 hours to go back and forth stirring the pot to avoid burning. You don't have to stand over the pot for a full three hours, just every few minutes go in and stir it, then continue about your household business.

KimD's Homemade Ketchup

5 pounds tomatoes, quartered.* 
2 medium onions, chopped
3 green peppers, chopped
1 Tbsp Salt
1 Tbsp Paprika
2 Tsp Cinnamon
2 Tsp Celery Seed
1 Tsp All Spice
3/4 Cup Sugar (or more for taste)
1-1 1/2 Cup Vinegar (based on taste)**

Cook tomatoes, onions, peppers in large pot until soft. 


Put in food processor and puree. Heads up, know how to work your food processor. I didn't and this is what happened:

Transfer the puree back to the pot and cook on rapid boil until thick, about 1 hour give or take. MAKE SURE IT IS THICK. If you question the thickness, it's not thick enough.

Add all the spices, sugar, and salt. Cook on medium to medium-low heat for about 30 minutes, stirring often...sugar likes to burn so stay close. Add the vinegar, I suggest to add 1/2-3/4 cup at first, let it simmer a few minutes, taste it and if the pucker on your face doesn't knock you over it's good. If the sweetness makes your teeth hurt, add a bit more of the vinegar. Now's the time to add more salt or other seasonings. It's all about your personal flavor preference here. Shoot, if you are all about heat, add some jalapenos or chilies now too!  Keep cooking the ketchup until it thickens. Make sure there is little liquid bubbling on top.

Pour into mason jars, leaving 1/4" from rim if you are going to process in a water bath to can this for a long shelf life. I knew we'd go through it in no time, so no water bath for my batch. This makes about 1 quart + 1 pint.


Enjoy!

*I used all the varieties we grow in the garden, including grape and cherry. Here's my laziness...I refuse to blanch, peel, core tomatoes so I did not. I cut off the stem part and then cut all the tomatoes into quarters. If you want your ketchup to be smooth and bit free, then go right ahead and peel & de-seed them.

I turned ketchup making into a homeschooling practical life lesson of knife work. ANNNND she cut her finger. Lesson learned, on both our parts.

**I used white vinegar but cider vinegar or even red wine vinegar will enhance the flavor, make it more "gourmet" tasting


DIY Deluxe Kid Wash Sprinkler for $40


The Deluxe Kid Wash

Thank you Pinterest for pointing me to the coolest sprinkler ever: The Deluxe Kid Wash!  My daughter's birthday party is this Saturday, it's predicted to be in the 90's, and we do not have a pool. Next best thing to keep the kiddies cool? A sprinkler.

How To

The Disney Family Fun website has the directions and suggests this can be built for around $40. Guess what? That is correct! We came in just shy of $40.

Where to Purchase the Supplies

All the PVC was purchased from our local home improvement big box store. We purchased the add-on's from a dollar store. It took about 2 hours max to construct and 10 minutes to take down and store in a nylon bag (also from the dollar store).

For the party we are adding a Slip-N-Slide under the sprinkler to avoid creating a mud bath of our lawn. A cheap tarp will work just as well.

Repurpose when done using

When the kiddies get too old for a Kid Wash, repurpose all that PVC. I'm thinking the tubes with the drilled holes will be perfect to put in the garden as part of an irrigation system.

We call our Daughter "B" so this little Bee is a perfect touch!


Instead of boring sponges we went with bath loofahs. The Stop/Go Signs are aluminum platters , 2 for $1! 

The directions call for Lawn Chair Vinyl Strips. We paid $1 for a vinyl shower curtain, hung it on curtain rings and cut it into strips. It may not last past the party but it was quick, cheap, and serves it's purpose.


The Birthday Girl testing it out


DIY on a Budget: Little Tikes Kiddie Pool turned Flower Bed

How to convert a kiddie pool into a flower bed


Year 4 of our Little Tikes Butterfly Beach Sandbox & Wading Pool  meant total repurpose. B is too big to sit in it as a pool and she has a big sandbox behind her playhouse. This year she needed her own space for flowers, per her request.


Queue the drill and some dirt! My husband drilled a few holes for drainage in each wing then filled it with planting soil. A family trip to Menards for flowers, a couple garden signs from Target's dollar bin, and presto! B's very own flower bed in front of her Little Tikes Victorian Cottage home. She has a pretty good set up I have to say!


I love watching her tend to her flower bed, gingerly kissing the flowers, patting them lightly and telling them "good night honey". Since I'm lightening up on the homeschooling for the summer, this bit of nurturing nature is a perfect learning experience for her.


I foresee at least another four years of use from this pool turned flower bed now!

How To Make Laundry Detergent and Save Money

Throw away your laundry detergent coupon stack! You need it no more!

Ha! My hours of scrolling through Pinterest once again have paid off! I have saved oodles of money on another of life's necessities that gouge my wallet at the cash register: Laundry Detergent!

The White Silk Purse's Concentrated Laundry Detergent is the one I chose. Our home is a fan of both liquid and powder detergents. The aggravation is powder detergent  and darks don't mix well, especially if you are  tired, overstuff the machine, and use cold water. Of the many options on Pinterest, this one stood out as the most versatile. 

Oh who am I kidding? I liked the damn picture on her site of the neatly stacked mason jars in her cupboard, the fact the soap is cooked so there is no powder left, and the bit of fun by whipping it in your stand mixer! Anything is worth doing if it ends up looking like whipped cream!

The verdict? I love this stuff! Not just for the uber money savings but also the smell (it does have a "heritage" type smell to it, reminds me of my grandma on her farm in Southern Illinois.), and it actually cleans the clothes great! Now don't go thinking it is a cure all. I still have to pre-treat my messy daughter's clothes with some hard core laundry stain removers, but I was doing that while using the expensive detergents already.

Suds-there are none. If you are one of the millions who equate suds with cleaning, first off, that is an incorrect assumption and second, this stuff will disappoint! I conducted many an experiment last week to make sure this stuff works. I overstuffed the machine (which tends to be my norm), used extra large water setting for small loads, used different amounts of the detergent, avoided using any bleach and fabric softner, dried the clothes in the dryer as well as hung them to dry.

Here are my suggestions:

  1. MAKE THIS STUFF for the sake of your wallet
  2. Make a small batch first (which yields about 50 loads on the low end, 192 on the high end. The picture above is the small batch yield)
  3. 4 tablespoons per large load seemed to be the best amount for my conscious sake
  4. When washing in cold, it may be best to let the water fill with the soap so it dissolves a bit. I'm jaded by powders and black clothes with a nice white film stuck in them from undissolved detergent.

Small Batch Recipe for Homemade Laundry Detergent
1 bar Fels Naptha soap ($.97/bar)
1 cup Borax 20 Mule Team ($3.49/box)
1 cup Arm & Hammer Washing Soda ($2.75/box)
3 cups water plus more to top off jars

Heat the water in a quart saucepan while you grate the Fels Naptha bar. Once grated, pour into the hot water and stir until completely dissolved. Turn off the heat then add the Borax and Washing Soda, stir until dissolved. Pour mixture equally into 2-quart sized jars, it should fill them about half way, top off with water to the neck of the jar. Lid them, give them a good shake, and let them sit overnight.

The next day, pour the contents of the jars into your stand mixer(the soap will have set and separated so it is almost jelly like in consistency), start mixing slowly-like you are creaming butter and sugar for some delicious cookies-then work your way up to a nice fast whipping speed. Stop when the soap looks like a light and fluffy whipped cream that you want to spoon into your mouth...but don't! Spoon that stuff into THREE jars, lid, and use the next time you do a load!

If it turns out you can't give up your wasteful money habit of high priced store bought laundry detergent, tie a nice bow around the lid, put a pretty label on the jars and give them as gifts to someone who will appreciate them!

BTW: There is enough Borax & Washing Soda left for you to make your own Dishwasher Detergent AND still have extra! Also Borax has many, many, many other household uses and since it's spring time it's great for killing weeds.


DIY Home Decor on a Budget: Race Bib Holder

Finally a display for my growing collection of race bibs!

It cost a whole $1 to make!

First I found an old shelf that was the perfect width to hold the bibs. Then I bought a package of 20 brass hooks for $1. Measured the distance between the most standard sized bib and screwed in the hooks. The bibs that are larger or smaller I used safety pins to hook them on. To hold my medals I screwed another hook into the side.

Using my Cricut with adhesive backed cardstock I cut out the word "Run", then applied it to the plaque. Two eye hooks were screwed to the top where I tied a ribbon for hanging and stuck a pink flower from one of my vases into a hook for a bit of Girly pizazz.

This took all of 15 minutes. One more craft can be checked off my list!

DIY Home Decor on a Budget Series: Reusable Puppy Pads

Puppy pads are expensive! We are spending about $40 a month on these darn things. So, just as we did with B to save money I have decided to go cloth. Washable, reusable puppy pads that will cost pennies to wash and we will never run out of pads!

DIY Home Decor on a Budget Series: Crochet Swiffer Cover

One of my new year's resolutions is to crochet an item a week. Now when I say Item I'm not talking blankets, sweaters, or anything too intricate. No, I want to crochet a dishcloth or swiffer cover a week. We go through both like crazy so any way to save money and create reusable items I'm all about!

A while back I posted about wanting to make my own Swiffer covers. Last night I finally made good on my word.

Realize I am a beginner with crochet, my gauge is usually all wrong and I miscount my stitches. With that said my first go round turned out pretty darn good. It works great too! (BTW it took about 2 hours to make)  You can find the pattern I used here.

It fits!
It works! And it is reversible!

DIY Home Decor on a Budget Series: Bathroom Shelf--FREE!


Our tiny bathroom was running out of space for our regularly used essentials. I scrounged the house for supplies and in a couple days made a shelf that is perfect for our needs! AND it cost me a total of $0! Yep, nothing! I love these types of projects!
Supplies:
old trim
trimming nails
Gorilla Glue
Clamps
Paint
Long Screws with Anchors


What to do:
Glue your shelf pieces together, clamp to hold and let dry overnight. Next day, reinforce with some trimming nails on each side. Paint, dry, hang! Simple!
See how old that trim is? I'm glad we held on to it!

Hung right above our mirror. Yes, those are all JR Watkins products. Only the best in this house!

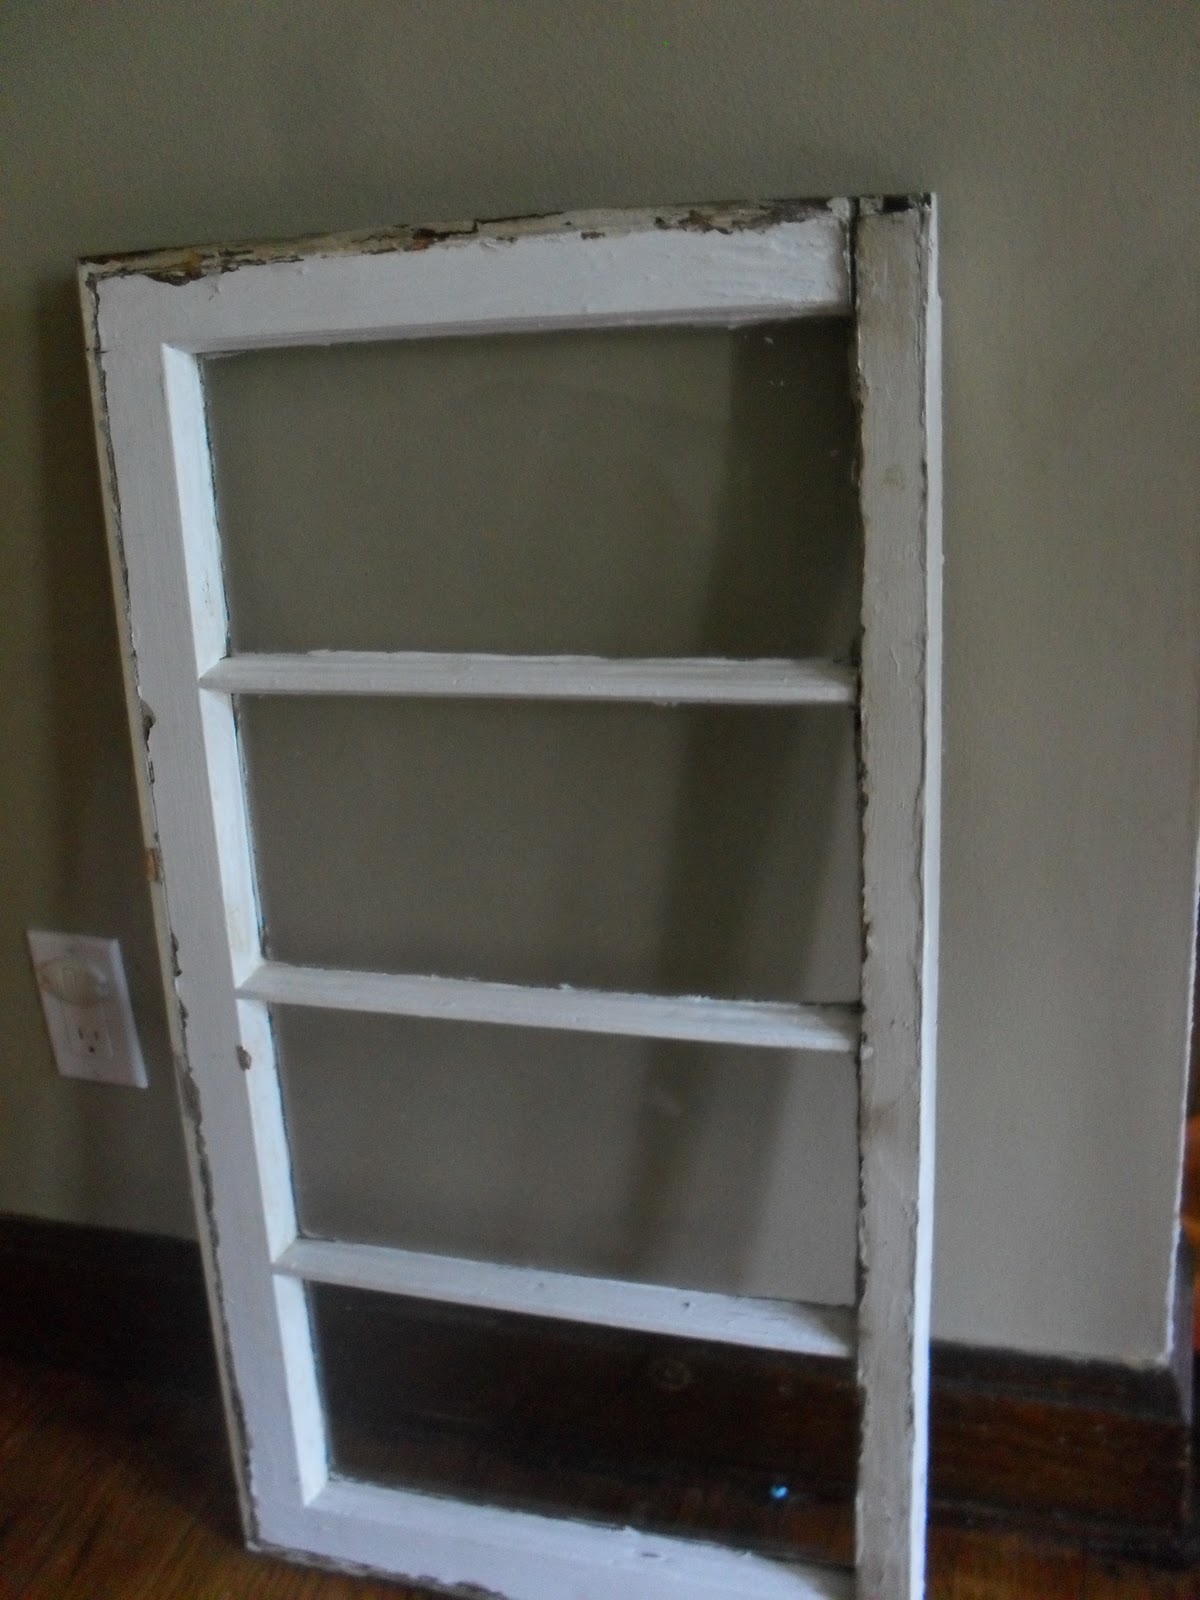
DIY Home Decor on a Budget Series: Old Window Jewelry & Photo Frame

Triple Purpose Old Window RePurpose! 


First, I have a good number of OLD family photos that are scattered on a shelf needing to go somewhere and burying them in a book just seems so final. Next, in my closet on a shelf is a knotted pile of necklaces that I don't wear because they are now in ball form so I need a space to hang them. Finally, my bedroom walls are quite bare and above my antique sewing table there is a large area just crying for some adornment. Here's what I did:

What is needed:
Window
Staple Gun
Glue Gun
Tape
Old lace tablecloth from thrift store (Or any material you have already)
Broken beaded bracelet
Picture hanging brass nails, screws, wire
4 long screws
Raffia

Cut the lace to size of the back of the window, leaving enough material to staple to the wood. Then lay out the pictures on the lace along with some bead accents from the broken bracelet.  Hot glue the beads and tape the pictures to the lace.  Once all is secure, put the window on a solid surface, lay the lace collage face down on the window and staple it securely to the window frame. 
The picture display part is complete. Now on to the jewelry holder part. Flip the window back over, drill 4 screws, 2 on each side, with enough space in between the top and bottom for long necklaces. Hot glue  beads on the screw faces and bam. The hangers for the necklaces are done!

I cut 2 pieces of lace about 1 inch thick and nailed them to the window on the bottom pane to hang earrings that I don't wear much also. 
Screw in a couple circle picture wire screws on the top, tie picture wire to them, wrap the wire with raffia,  and it is finished! Since this was going in my bedroom and I've got a shabby Victorian roses theme I attached a couple silk roses from my wedding cake topper to the corners to bring it all together!
What I love about using the lace is that the color of my walls comes through and adds depth to the window making it feel like it is a built in part of the room. Best part? I spent $0 on this project. Everything I used I already had! I Love FREE!

DIY on a Budget: Cupboard Door Turned Wall Art

Turn an old cabinet door into a rustic wall hanging


It took five years of wondering to finally venture into our spider engrossed garage to look for treasure in the rafters. I was not disappointed!

Cupboard doors, uber old with layers of paint and beautiful hinges & hardware were up there waiting to be freed from their dark, dank, creepy-crawly prison. I believe these are the remnants of the original kitchen cupboards for the house. It makes me almost cry knowing this. Call me weird, but I love having all things original in here. I feel like I'm the keeper of this home's prized possessions. 

A little elbow grease is all it takes

While singing the song “…Merry ole Land of Oz. With a Brush, brush here….”, the first door got all cleaned up and was ready for its perfect spot in the house. We recently hung shelves in the living room left with a gaping spot needing something special. I am the type to wait until what is meant to be shows itself AND IT DID!

The door needed a bit more, kind of how the bow was just what the cowardly lion needed. The wall looked good but life needed to be on it, not just objects. I found an empty wine bottle with a label that resembled the scenes in the framed prints already shelved, found an old white small shelf hanging in the garage not being used, grabbed a couple screws, a picture hanging mount, and a shoot from my only living indoor houseplant.

Budget Friendly

All this created, what is to me, the most beautiful living old piece of art on the wall. Total cost? 0. Yep, ZERO! I love repurposing stuff. How about you?


DIY Home Decor Series: Antique Cast Iron Stove turned TV Stand

A quirk of mine: TV in the main living room of a home. Do not ask me why, it is still on my ‘yet to be addressed’ list for my therapist.

Well over ten years ago, while still single and living in my apartment I purchased a black pressed wood corner TV stand from Kmart. Sturdy as it was it moved with us to our home in 2006. The unit served its purpose well until Baby B came along. The vcr/dvd players were way too accessible and mesmerizing. After ruining one surround sound 5 disc player and a vhs/dvd player we first timers got smart! IKEA we went. Bought a shelving case to attach to the wall ABOVE the TV so little B could no longer have a hiding place for cookies, toys, and her mass collection of Caillou DVDS.

The TV stand, so long a loyal home member turned into a dust and toy collecting eyesore. I loathed seeing it as well as cleaning it. It was a place for B to hide treats and for our pets to store their toys. It was disgusting!

Finally, we opened the garage (the place of hidden treasure) and pulled out the gorgeous cast iron stove that was rotting away in the corner of our accumulation.

My husband and FIL pulled out the heater part then took the body apart for a good power washing. Most of the grime came off but some still remain. For many this may be gross, for me it is a reminder that I am a caretaker of this object that sustained life and comfort in the cold of winter for those living before the luxury of central heat.

The cast iron heater unit of the stove was scrapped. The cabinet was put together and is now our TV stand! We put a couple makeshift shelves in it to hold the DISH box & DVD player, added a string of lights we had in the garage to add a bit of fake fire ambiance, added a $1 basket on the side to hold all our remotes and PRESTO! Another historic, long discarded piece brought back into the home that has been aching for familiarity and joy.

I admit, the TV does not look good on it, but my heart cries with happiness when I see the lights twinkle and know that disgusting, dust collecting, corner unit is now decomposing in a landfill.

DIY flavored syrups for coffee drinks.

How to make flavored syrups for coffee and save $

It's that time of year! The cool weather sets in and my Pumpkin Spice Latte from Starbucks Gland goes into overdrive!

Being on an uber budget I cannot forfeit heating the home for a venti latte everyday! (That was a huge breakthrough. You'll see me on A&E Intervention!)

Next best thing? Make my own freaking autumn flavored goodness!

If you don't already have this stuff, well, shame on you and go get it!

Mason jars with lids
Sugar
Brown Sugar
Pumpkin Pie Spices, vanilla extract, caramel extract. Frankly any flavor you love to pay $5 for at the coffee shop.

Since these are coffee syrups, I make them thinner, i.e. I don't boil the mixture down to a thick syrup.

Ok, ok, here's the How To part:
2.5 cups water
2 cups sugar
1/2-3/4 cup brown sugar
4+ tablespoons Spices or Extracts to taste-always go strong on the flavor...you are mixing with a strong base, remember?

Mix sugar and water in sauce pan over med-low heat until sugar dissolves-no boiling, but keep stirring. Add extracts and heat on low for another 5-8 minutes.

Taste, taste, taste. Add more brown sugar and extracts if you think you need it! If you are a 4 pump caramel latte type, make you flavors extra strong!!! Just a heads up and shout out, the better quality the extracts the less you will have to use. Watkins are the best I've come across. (I can get you some, just ask)

Once the syrup is cooled put in mason jars & label them. We bought some glass oil & vinegar dispensers at a local big box store which work perfect for pouring!

Questions? Seriously? You don't know how to make a coffee drink? Don't ever call yourself a coffee drinker in front of me because my caffeine shaking hand may slap your not-coffee-stained teeth! ;-) I kid of course, coffee addicts are not violent. Just give us our java and leave us be!

DIY Home Decor on a Budget Series (aka addicted to Pinterest!)

Our neglected front steps with cousins. Farmhouse is in the background.
My home is 100 years old.  It is a red brick bungalow nestled in an old original part of town.  It sits on property which used to be farm land with the original farm house still standing as its neighbor.

I love history~more important I love historic.  I love knowing that the floors I walk on are original which decades of people have walked on, all with a story.

When we moved in the house was disgraced.  My heart ached for it.  Thus my mission to research and bring back some attributes that may soften its pain and bring it happiness once again.

Here's where my neurotic hangup caused a snag~I hate things on walls. Especially personal pictures.  For years our decor has been a major modge podge of my old apartment furniture and few wall hangings here and there.

This past month something inside me came alive! My heart yearned to turn this house I so dearly love into a warm, inviting, lived in by human beings and furry creatures home.  I actually want people to walk in and be able to determine a bit about us and what we love by our surroundings.  Plus, a dear friend Kim got me HOOKED on Pinterest which totally got my creative juices in overdrive.  Who needs 5 Hour Energy when you've got Pinterest?

For the next few weeks I will highlight a DIY I've done around here and you too can be part of my home's continuing, living story.

First in my little series is our dining room Fireplace Mantel Mirror Frame turned Chalkboard! Stay tuned.

CEO Series: DIY {FRUGAL} Counting Puzzle

Chief Education Officer Series: DIY (FRUGAL) Counting Puzzle

If I had a million dollars I'd buy a monkey AND all the learning tools from Lakeshore Learning. Since I haven't the coin I am doing my best to craftily improvise with what I have on-hand. There is a box in the basement FILLED with scrapbooking material (and oodles of pictures but lets not go there) and topped with an inch or so of dust. Presto, time to create some Pre-School learning thingies.

Counting Puzzle
Supplies: 2 pieces card stock, straight edge cutter, scissors, glue

Print the cards on one of the cardstock sheets
Glue the 2 pieces of cardstock together. Let dry completely b4 cutting
With straight edge cutter, cut out all cards. Using scissors cut between the number and the dots
Enhanced by Zemanta
Related Posts with Thumbnails